 Bundie
Understanding Your Deposit
This guide walks you through the complete Bundie experience, from connecting your wallet to managing your yield positions across multiple chains.
Phase 1: Setup (One-Time)
Step 1: Connect Your Wallet
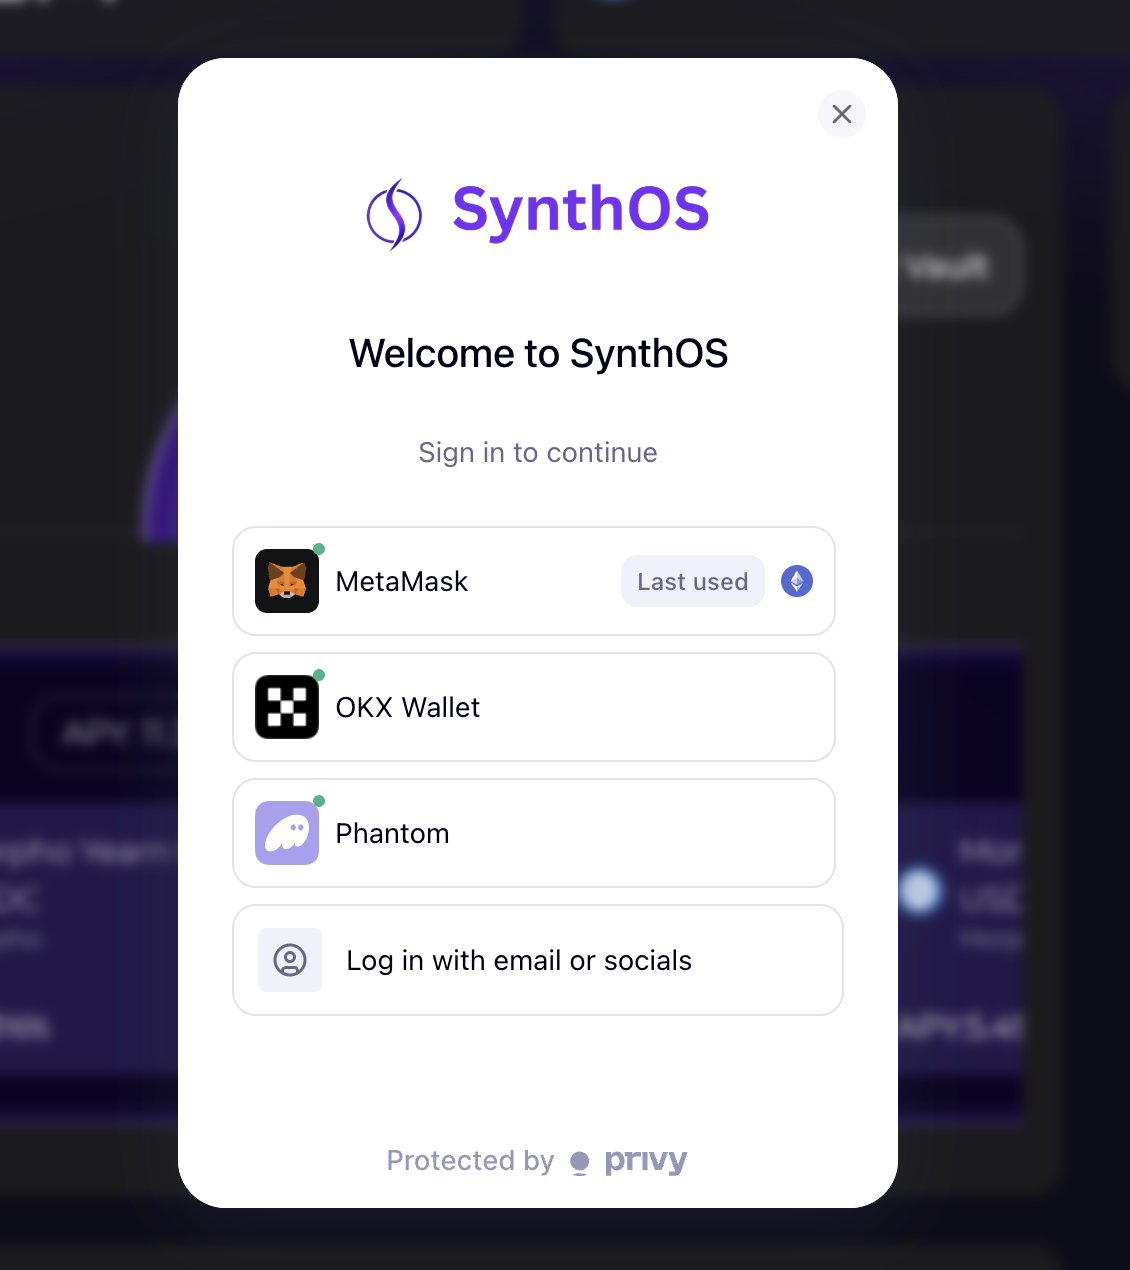
Two ways to connect:
Option A: Social Login (Recommended for Beginners)
- Sign in with Google, Apple, or email
- Creates an embedded wallet automatically
- Gas fees sponsored for initial transactions
- No browser extension needed
Option B: EOA Wallet (For Experienced Users)
- Connect MetaMask, WalletConnect, or other Web3 wallets
- Use your existing wallet and addresses
- You manage your own gas fees
- Full control over private keys
What happens next:
- Bundie provisions a Privy smart wallet client for you, scoped per chain
- Your login wallet is just for signing — funds live in your Bundie Accounts on each home chain
- A session signer is registered so future actions are gasless and don't re-prompt for signatures
Step 2: AI Analyzes Your Activity
Once connected, the AI immediately begins analyzing:
What it scans:
- Last 30-90 days of transaction history
- Protocols you've interacted with across DeFi
- Types of strategies you've used (lending, LP, staking)
- Average position sizes and hold durations
- Chains you're most active on
Analysis time: 2-3 minutes for comprehensive profile
Your DeFi Profile includes:
- Experience Level: Beginner, Intermediate, or Advanced
- Risk Tolerance: Conservative, Balanced, or Aggressive
- Preferred Chains: Which networks you use most
- Strategy Preferences: Lending, liquidity provision, staking, etc.
New wallet? If you have no DeFi history, AI defaults to conservative recommendations. As you use Bundie, it learns your preferences.
Step 3: Create Your Bundie Accounts (Multi-Chain)
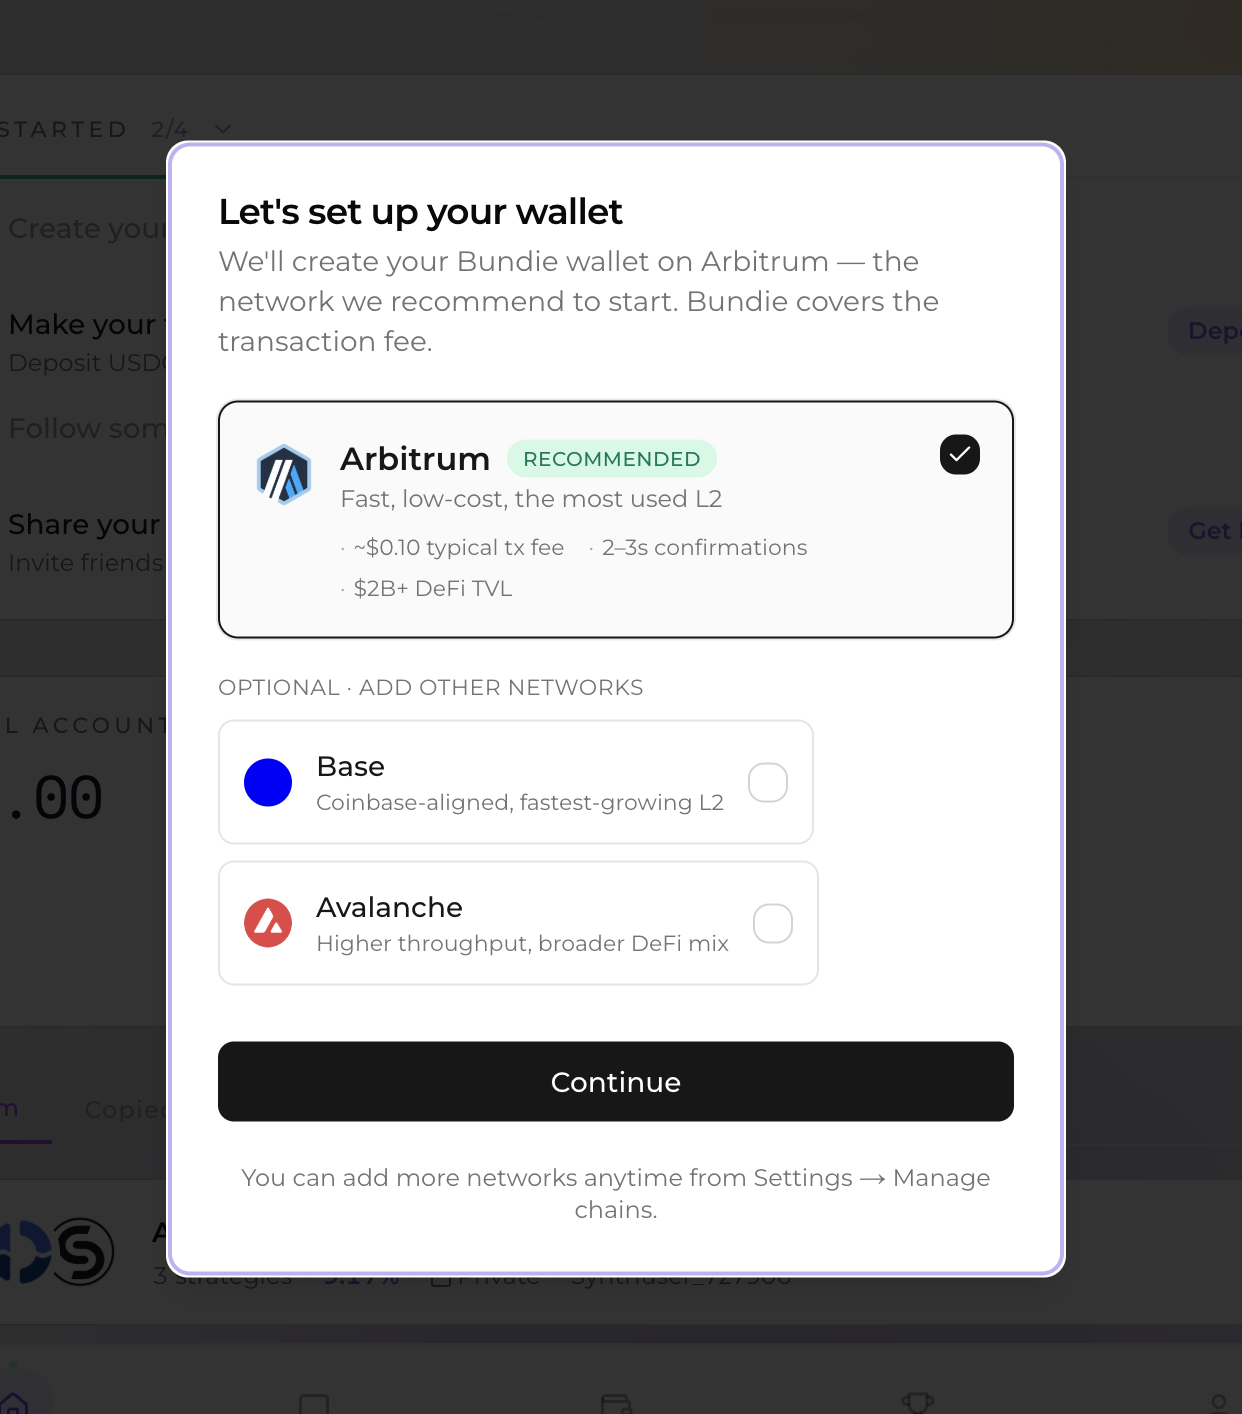
What is a Bundie Account?
A Bundie Account is a personal smart contract (the AccountManager) deployed on a home chain that holds your positions on that chain. You can have one Account per supported home chain — Arbitrum (the hub), Base, Avalanche, Optimism, Celo, and more as new chains are enabled.
Why per-chain Accounts:
- Yield lives natively on each chain — no constant bridging back to a single home base
- Same-chain deposits skip bridges entirely (gas only, no LayerZero fee)
- You can grow into more chains over time without redoing your setup
Pick your home chains: A blocking modal walks you through selecting one or more chains:
- Arbitrum is pre-selected as "Recommended" — it's the hub and works for almost everyone
- Additional chains live behind an "Add more networks" disclosure (Base, Avalanche, Optimism, Celo, …)
- Disabled chains show their reason inline
- At least one chain must be selected to proceed
What happens per chain:
- If you already have an Account on a chain, it's reused — no transaction needed.
- Otherwise a new Account is created for you on that chain.
Sequential, never parallel: chains are created one at a time, so a single failed chain can be retried without re-submitting confirmed ones. If you close the modal mid-flow and reopen the app, your progress is restored.
Gas cost: Sponsored on Arbitrum and other hub-grade chains during onboarding. Other chains may charge a small native-token fee per Account.
Legacy note: Scroll is supported as a legacy chain only. Pre-migration users may still have a Scroll Account visible (marked with a "Legacy" pill). New deposits never target Scroll — you'll be guided to withdraw from it back to a current chain.
Adding more chains later: You don't have to pick everything upfront. From Settings → Manage chains you can add any remaining supported chain at any time using the same flow.
Phase 2: Depositing & Allocating
Step 4: Deposit USDC to a Bundie Account
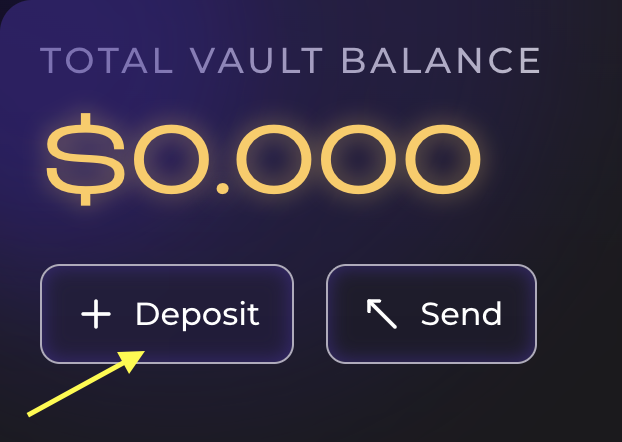
Deposits use a two-phase flow that matches how you actually think about your funds: pick where they are first, then pick where they should land.
What to deposit:
- USDC: Main asset for yield strategies (resolved per-chain — each chain has its own canonical USDC address)
- ETH / native gas: Only needed on chains you'll transact on (Privy/session signer covers most cases for new users)
"Where are your funds?" (Source chain)
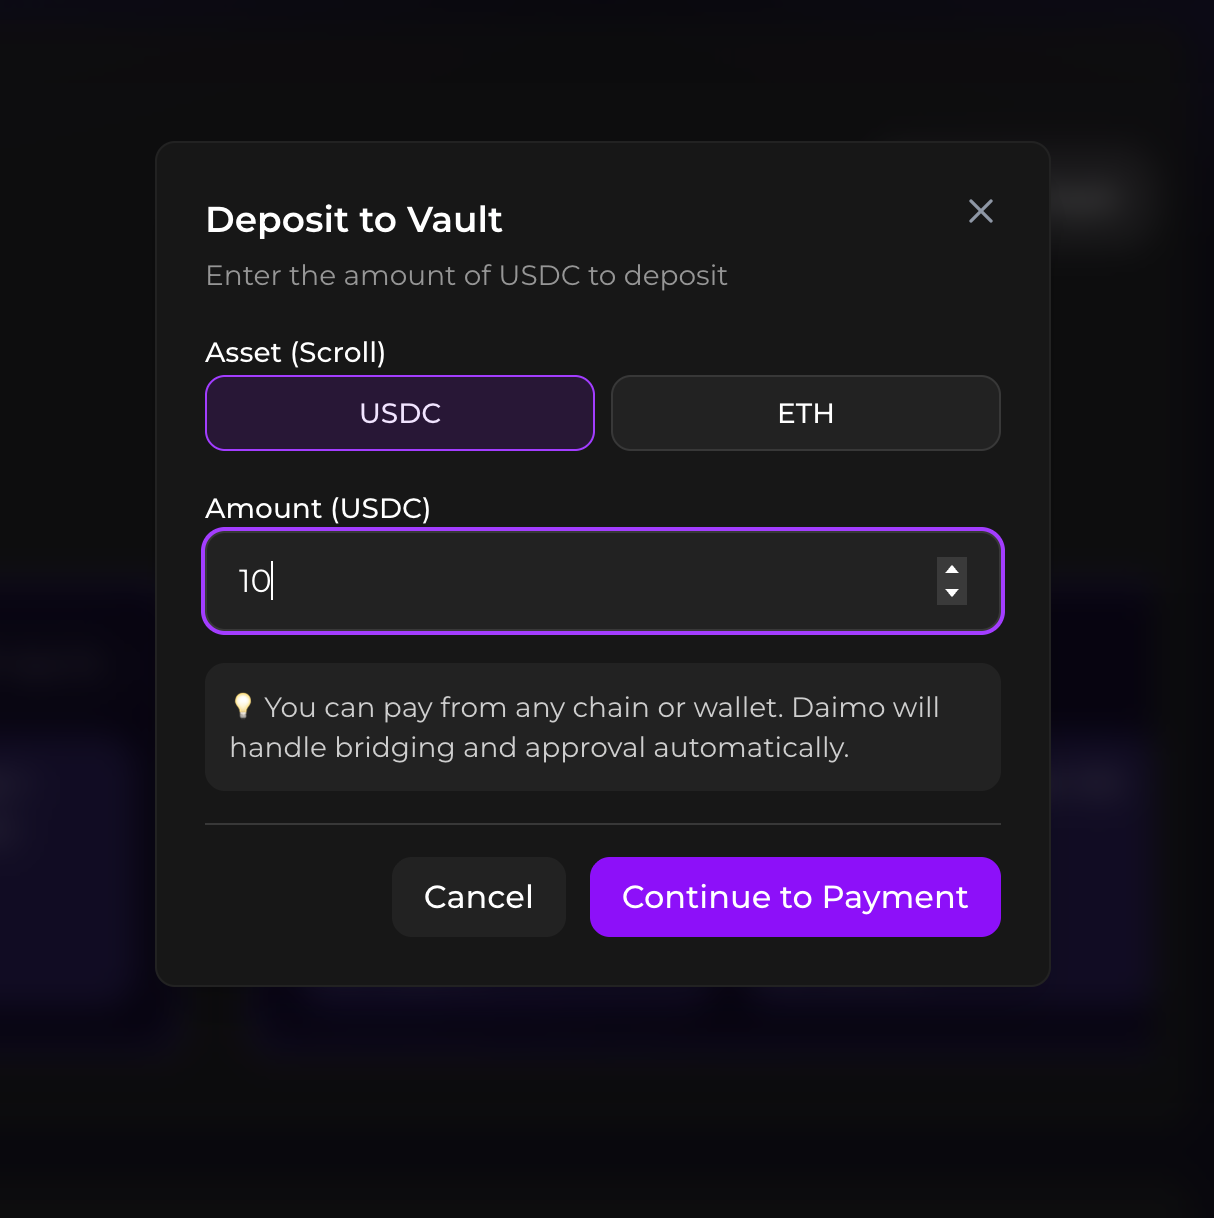
The deposit modal lists every chain where your wallet holds USDC, sorted by balance, with the per-chain amount shown. The default is:
- Your EOA's currently connected network, if it has USDC, otherwise
- The chain with the highest USDC balance
Pick a source chain and continue.
"Where to deposit?" (Destination Account chain)
Destination is the Bundie Account chain that will receive the funds. The smart default is:
- Source chain — if you have an Account there. This is the no-bridge, gas-only path.
- Otherwise, your last-used destination (sticky), then the app's active chain, then Arbitrum as the final fallback.
A "From {Chain} · change" link at the top lets you jump back to Phase 1.
Same-chain vs. cross-chain:
| Source = Destination? | What happens | Fee |
|---|---|---|
| ✅ Yes | Direct deposit on that chain — USDC moves into your Account, then into the strategy | Gas only |
| ❌ No | Relay bridges USDC via LayerZero to your destination Account chain | Relay quote (shown before you confirm) |
If you have only one Bundie Account chain, the destination picker is hidden — there's only one place your funds can go.
Minimums: Each strategy has its own minimum (typically $10–100). If your deposit is below it, you'll see a warning at confirm time.
Step 5: Browse Curated Bundles
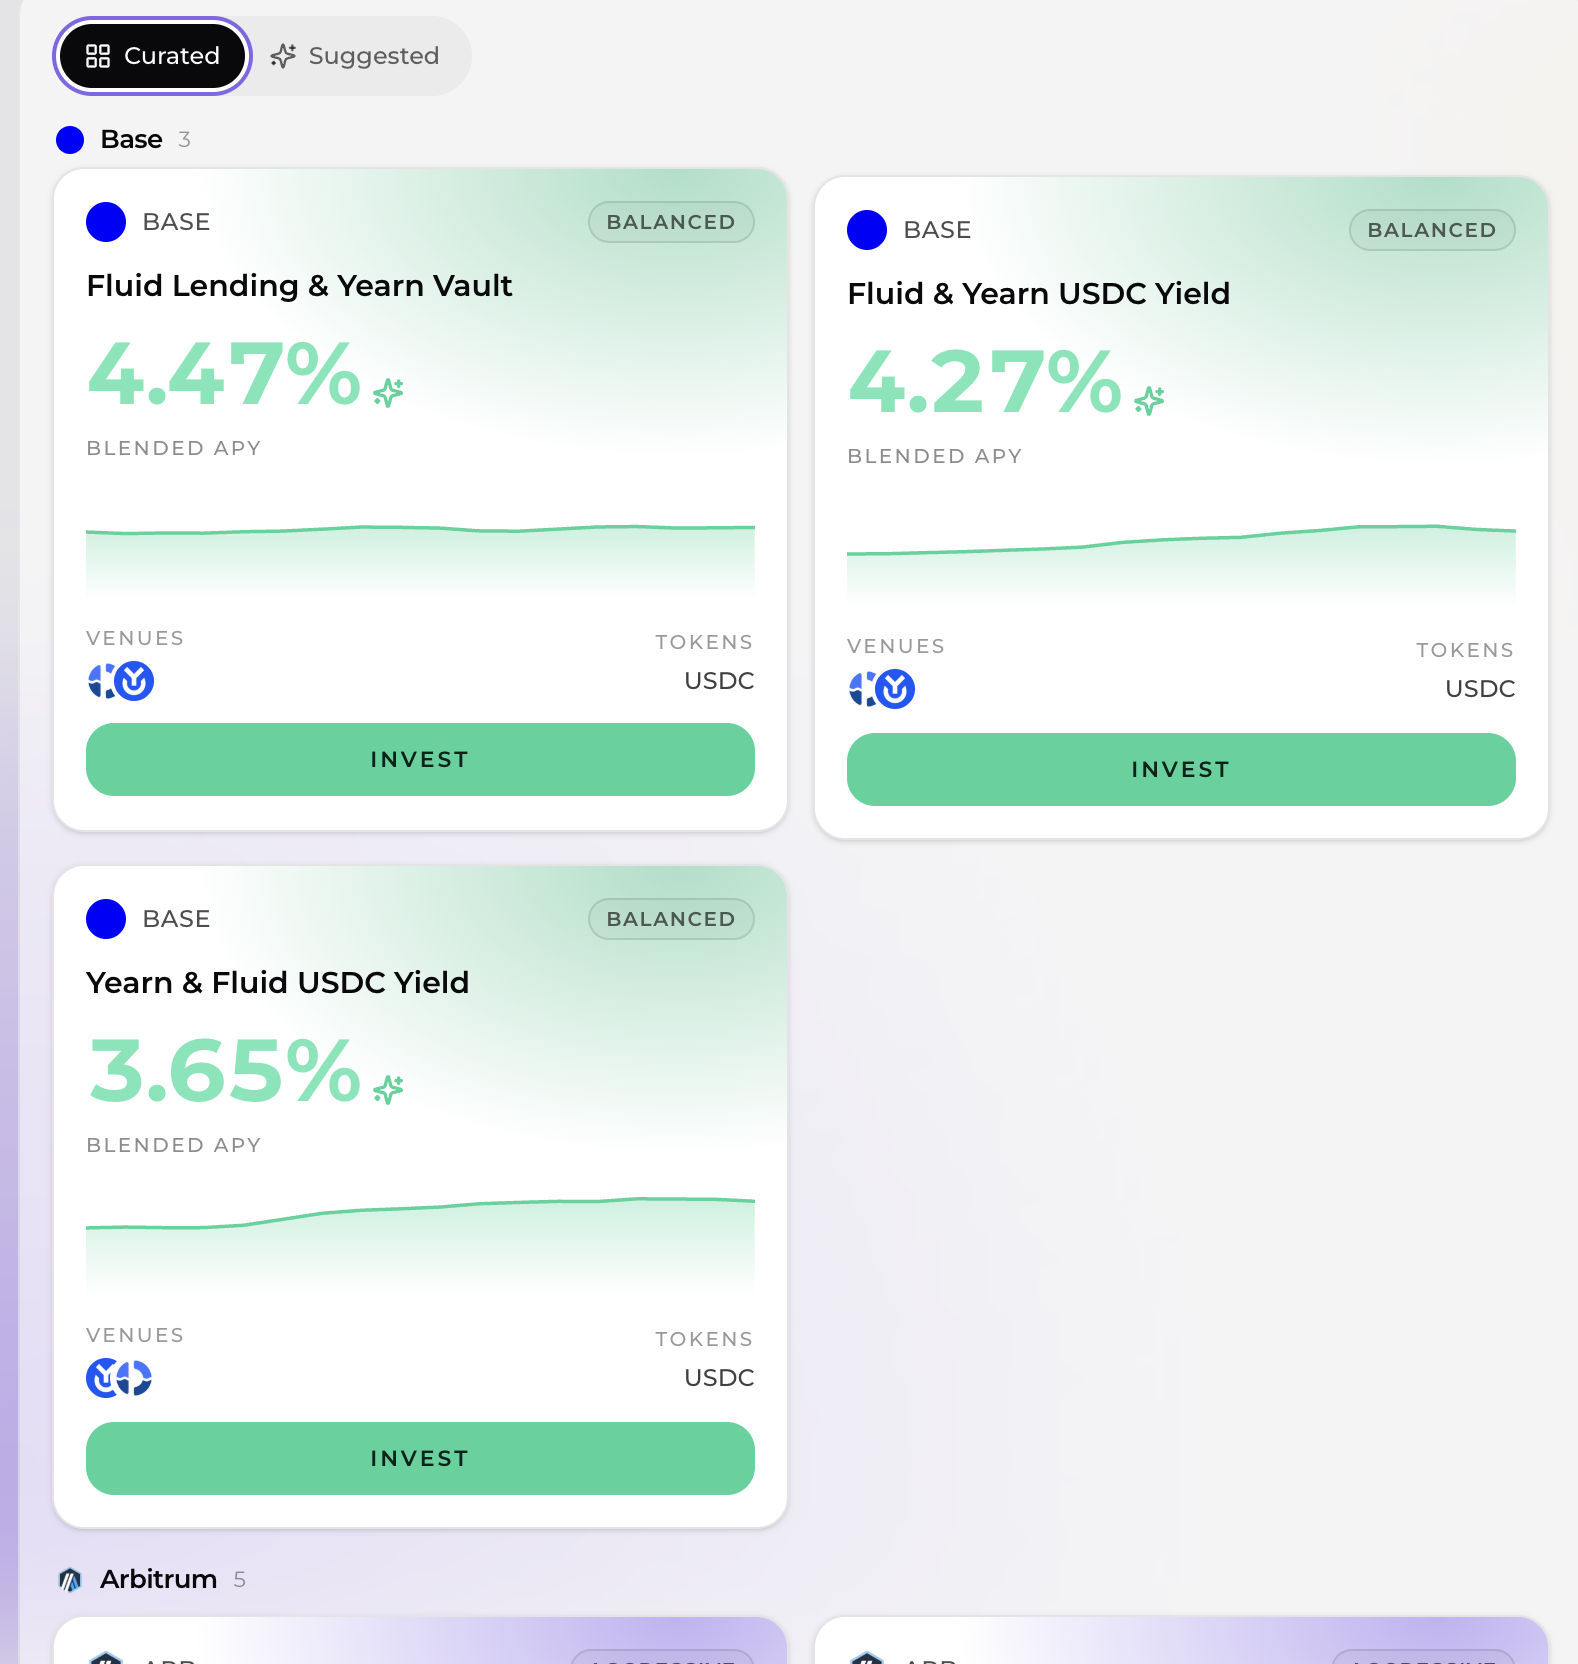
After depositing, the Curated Bundles card shows you ready-made yield portfolios. It has two tabs:
- Curated — pre-built bundles maintained by Bundie, grouped by chain and sorted by APY (highest first)
- Suggested — an AI-personalized bundle tailored to your portfolio, with the estimated APY improvement vs. your current positions
What each bundle card shows:
- Bundle name (theme) and its target chain
- Risk band: Conservative, Balanced, or Aggressive
- Blended APY: the composite yield across every protocol in the bundle
- Venues: the protocols included (e.g. Aave, Morpho, Compound, Ambient, F(x) Protocol, Quill Finance), shown as stacked logos with a count
Bundles are organized by chain rather than filtered — each chain section lists the bundles available for the Accounts you hold there.
Step 6: Choose a Strategy
Option A: Invest in a Yield Bundle
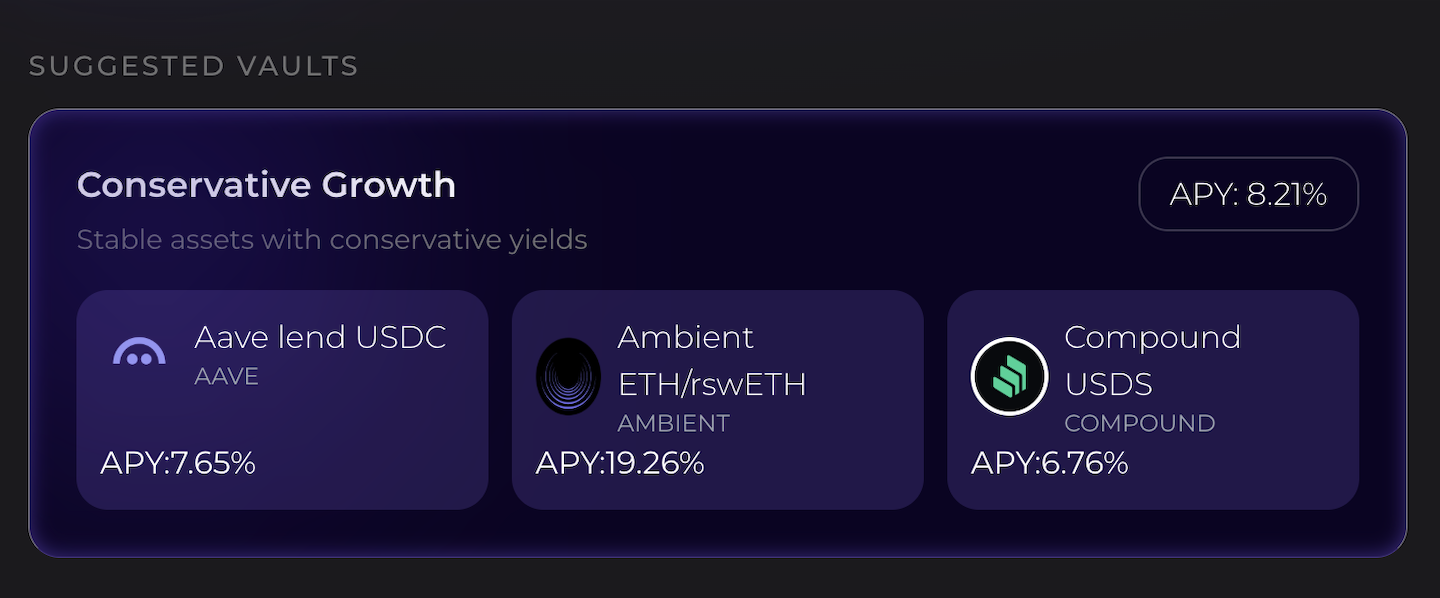
What is a bundle? A bundle is a curated portfolio of several protocol venues, each given a target weight, grouped by risk band:
- Conservative: weighted toward blue-chip lending protocols
- Balanced: a mix of established and higher-yield venues
- Aggressive: tilted toward higher-risk, higher-reward venues
Tapping a bundle opens its detail view, which shows:
- The blended APY and the chain/risk-band pill
- A short narrative explaining the bundle's strategy and exposure
- An allocation bar segmented by each venue's weight
- A per-venue breakdown: protocol, individual APY, risk score, and weight %
- Status flags where relevant — a venue can be marked Unavailable (disabled or unroutable) or Stale data (APY/TVL may be out of date but still depositable)
Benefits:
- Instant diversification across multiple protocols in one allocation
- Pre-set, weight-based allocation — no manual balancing
- One-click deployment via the Allocate button (disabled if every venue is unavailable)
Option B: Invest in Single Strategies
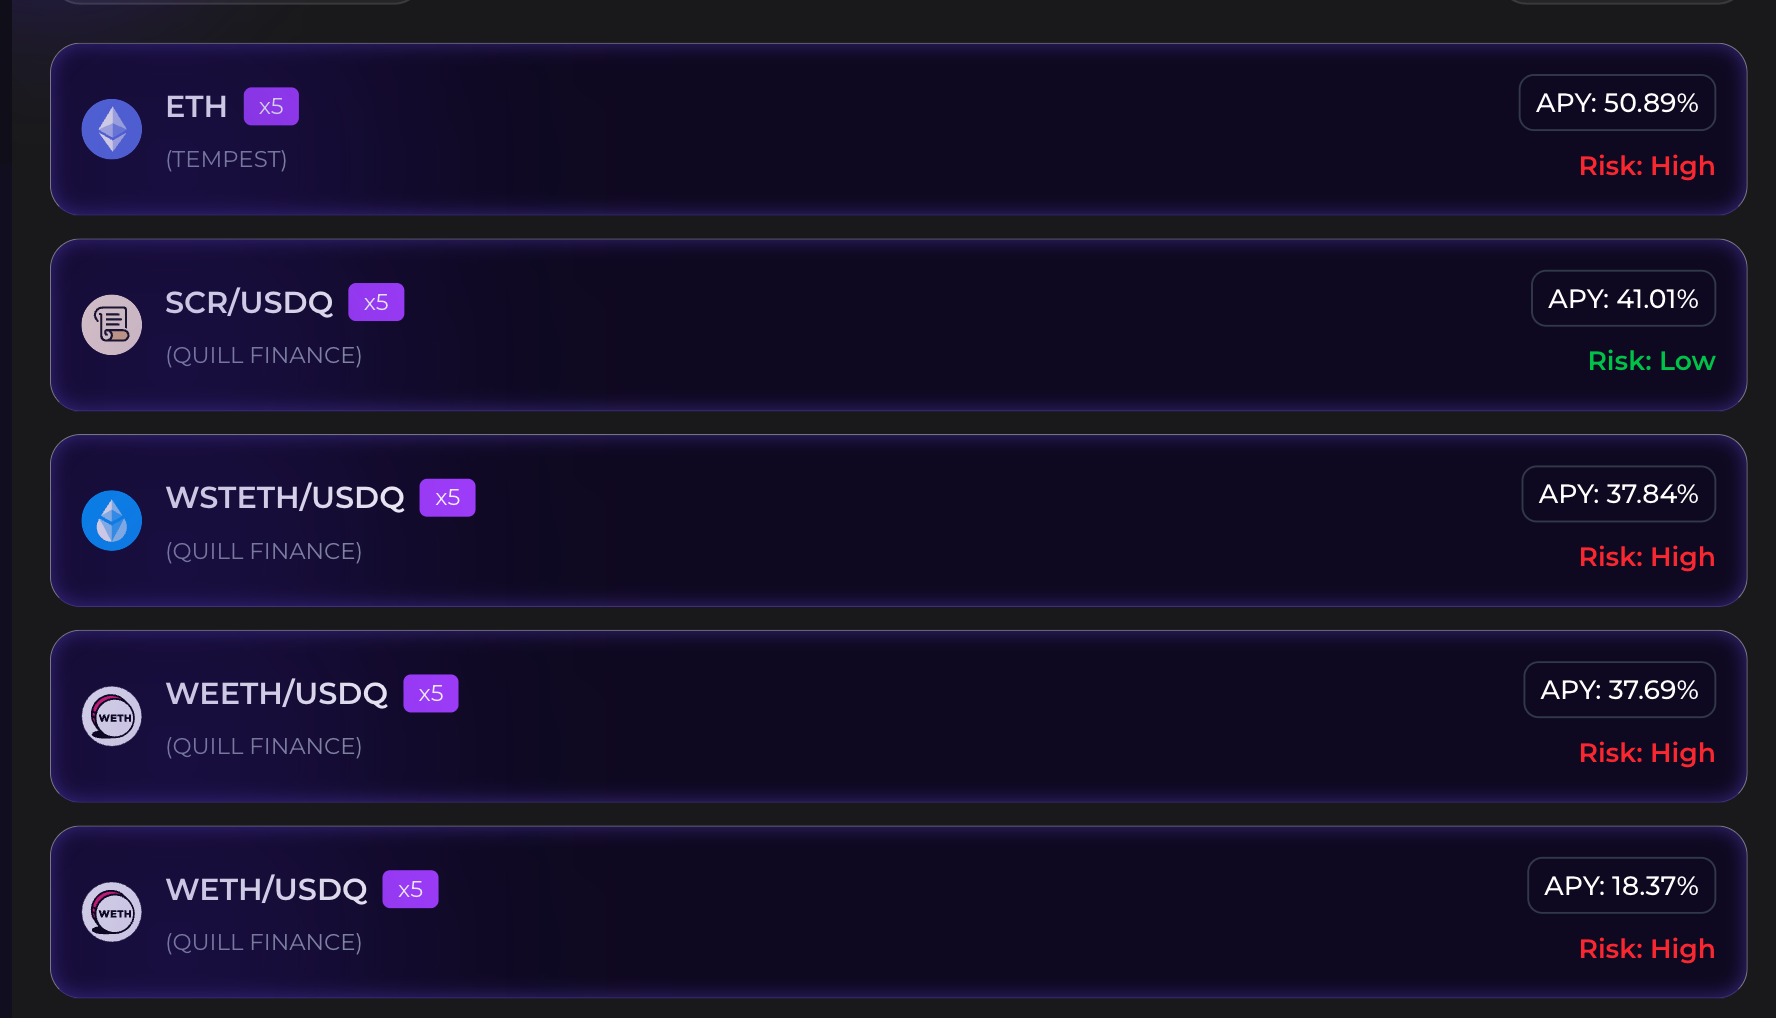
When to choose single strategies:
- You want full control over allocation
- You have strong conviction in specific protocols
- You're building a custom portfolio
- You want to avoid certain chains or protocols
Strategy details:
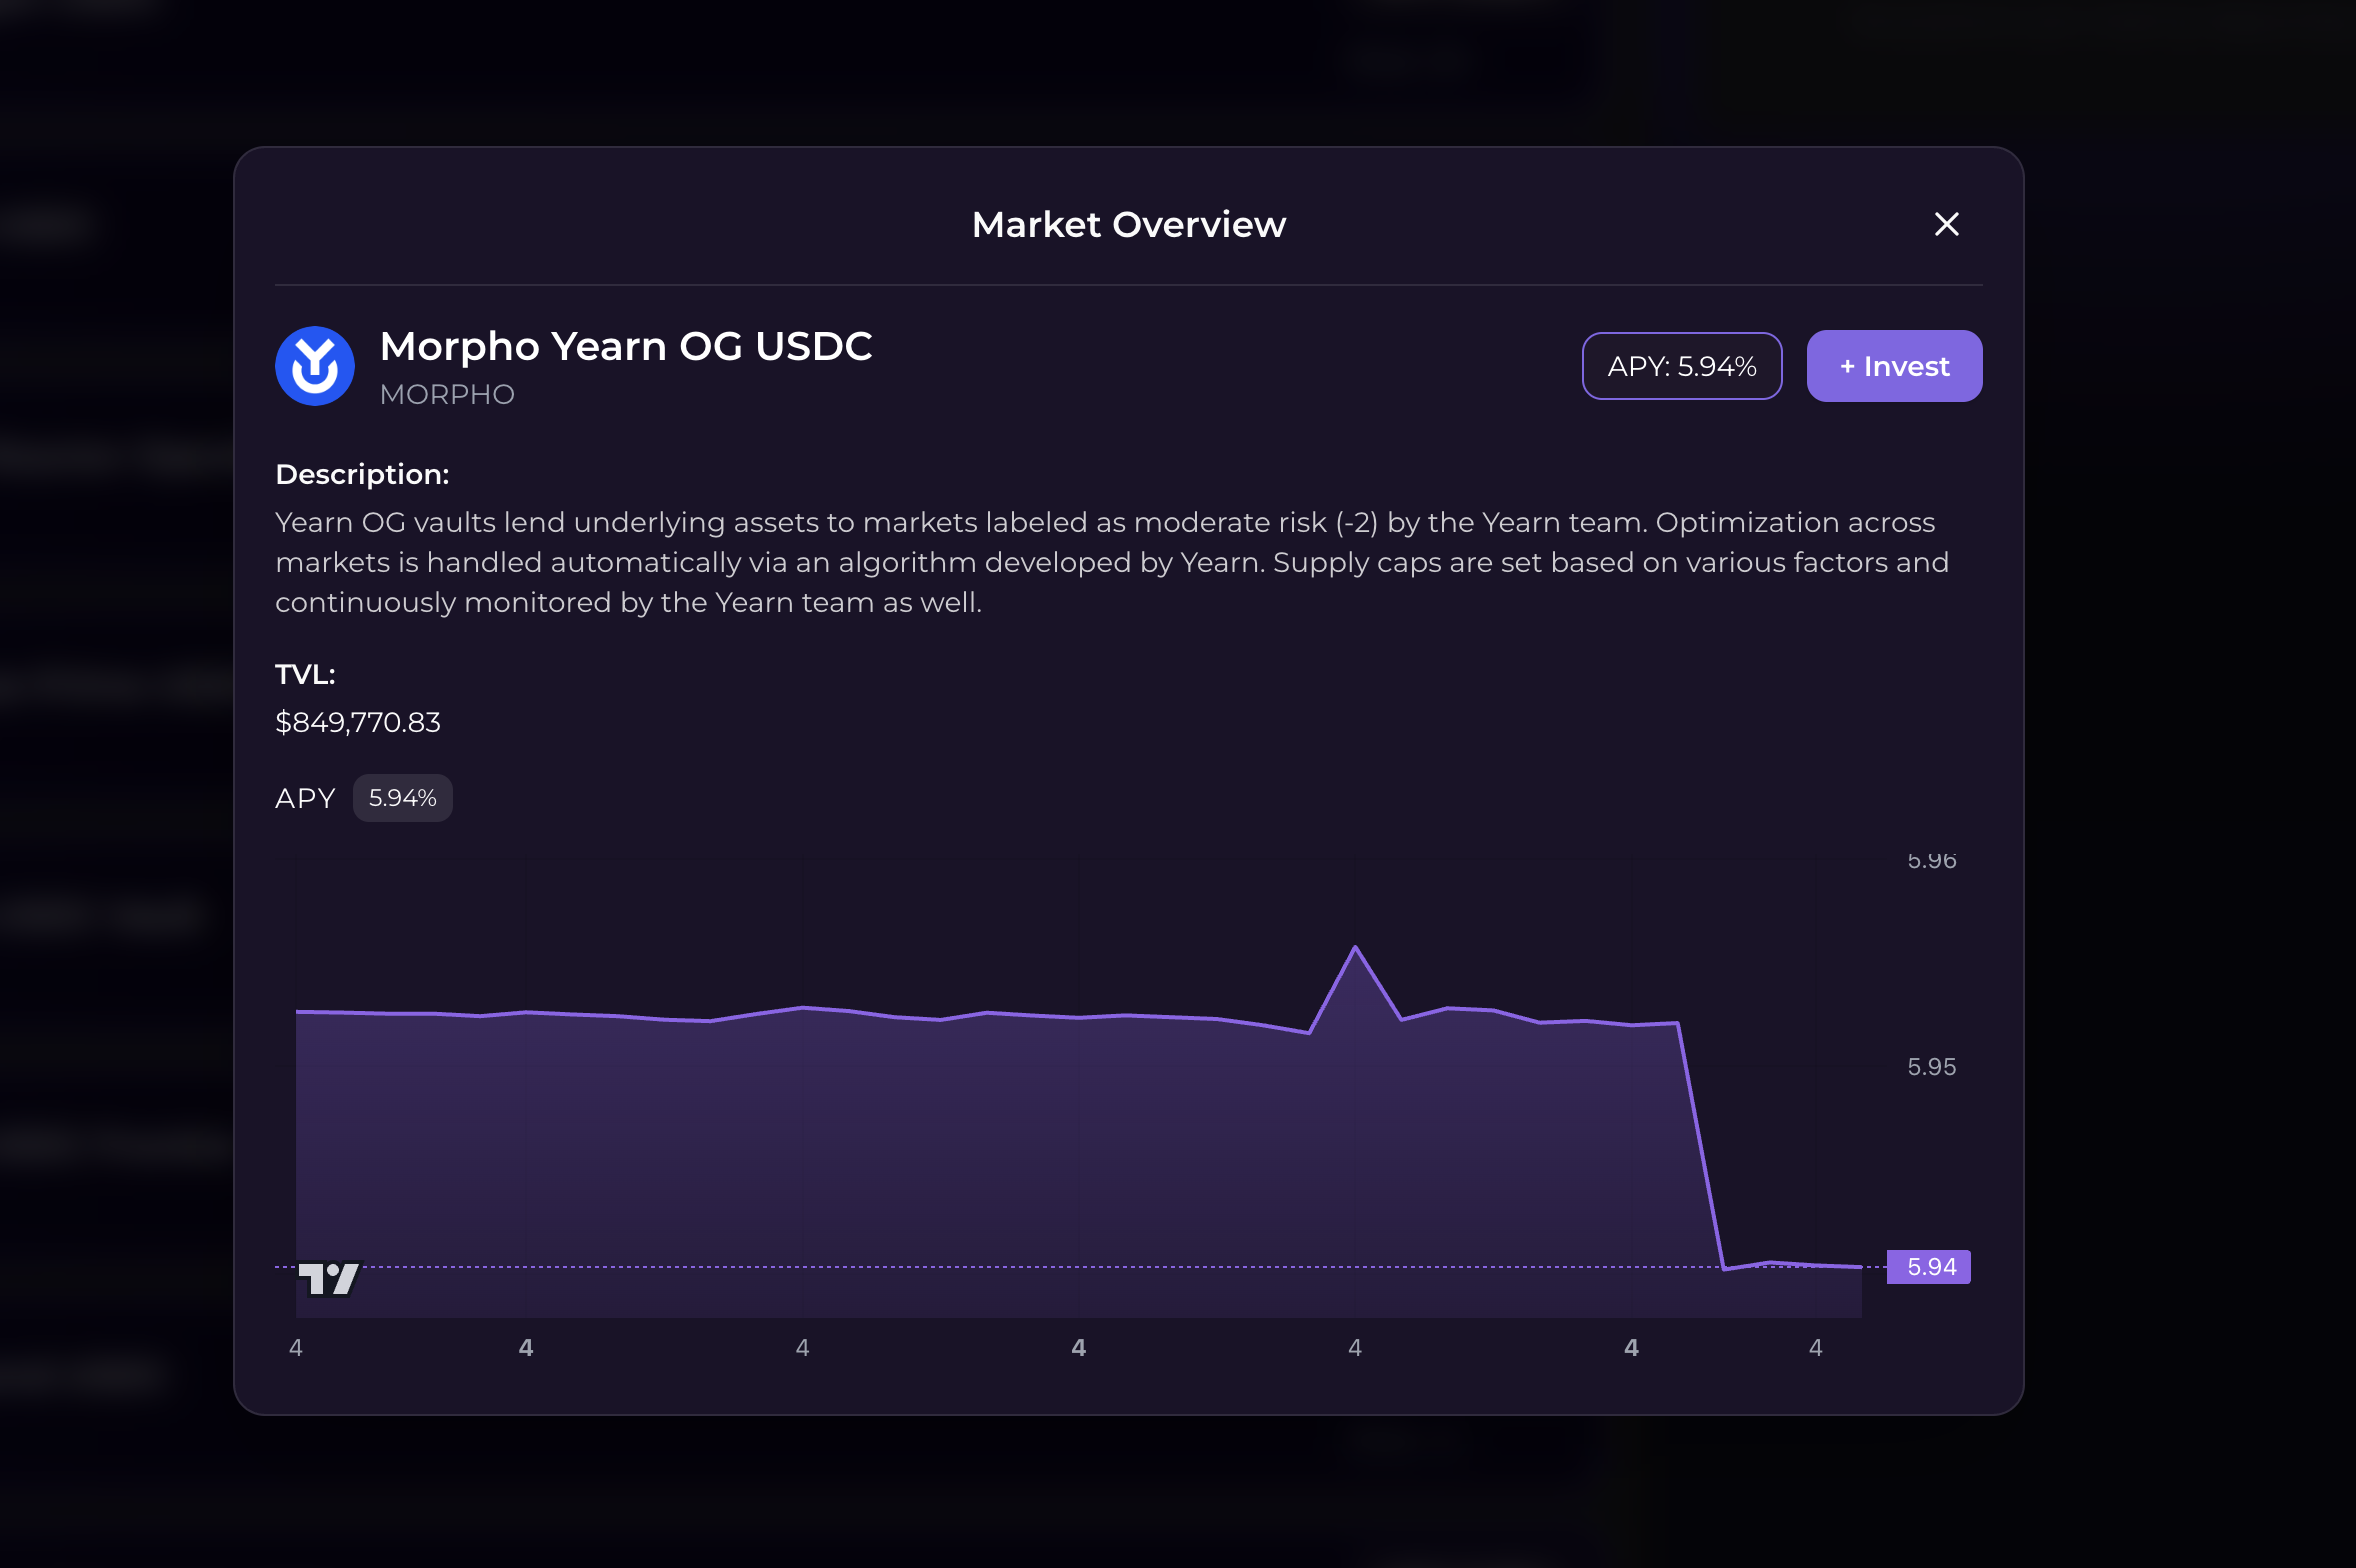
Each strategy shows:
- Current APY and historical chart
- Protocol name and audit status
- Total Value Locked (TVL)
- Your potential earnings calculator
- Risk score (0-100, higher = safer)
- Minimum deposit amount
- Source chain (which Account chain it deploys from)
Step 7: Allocate Funds
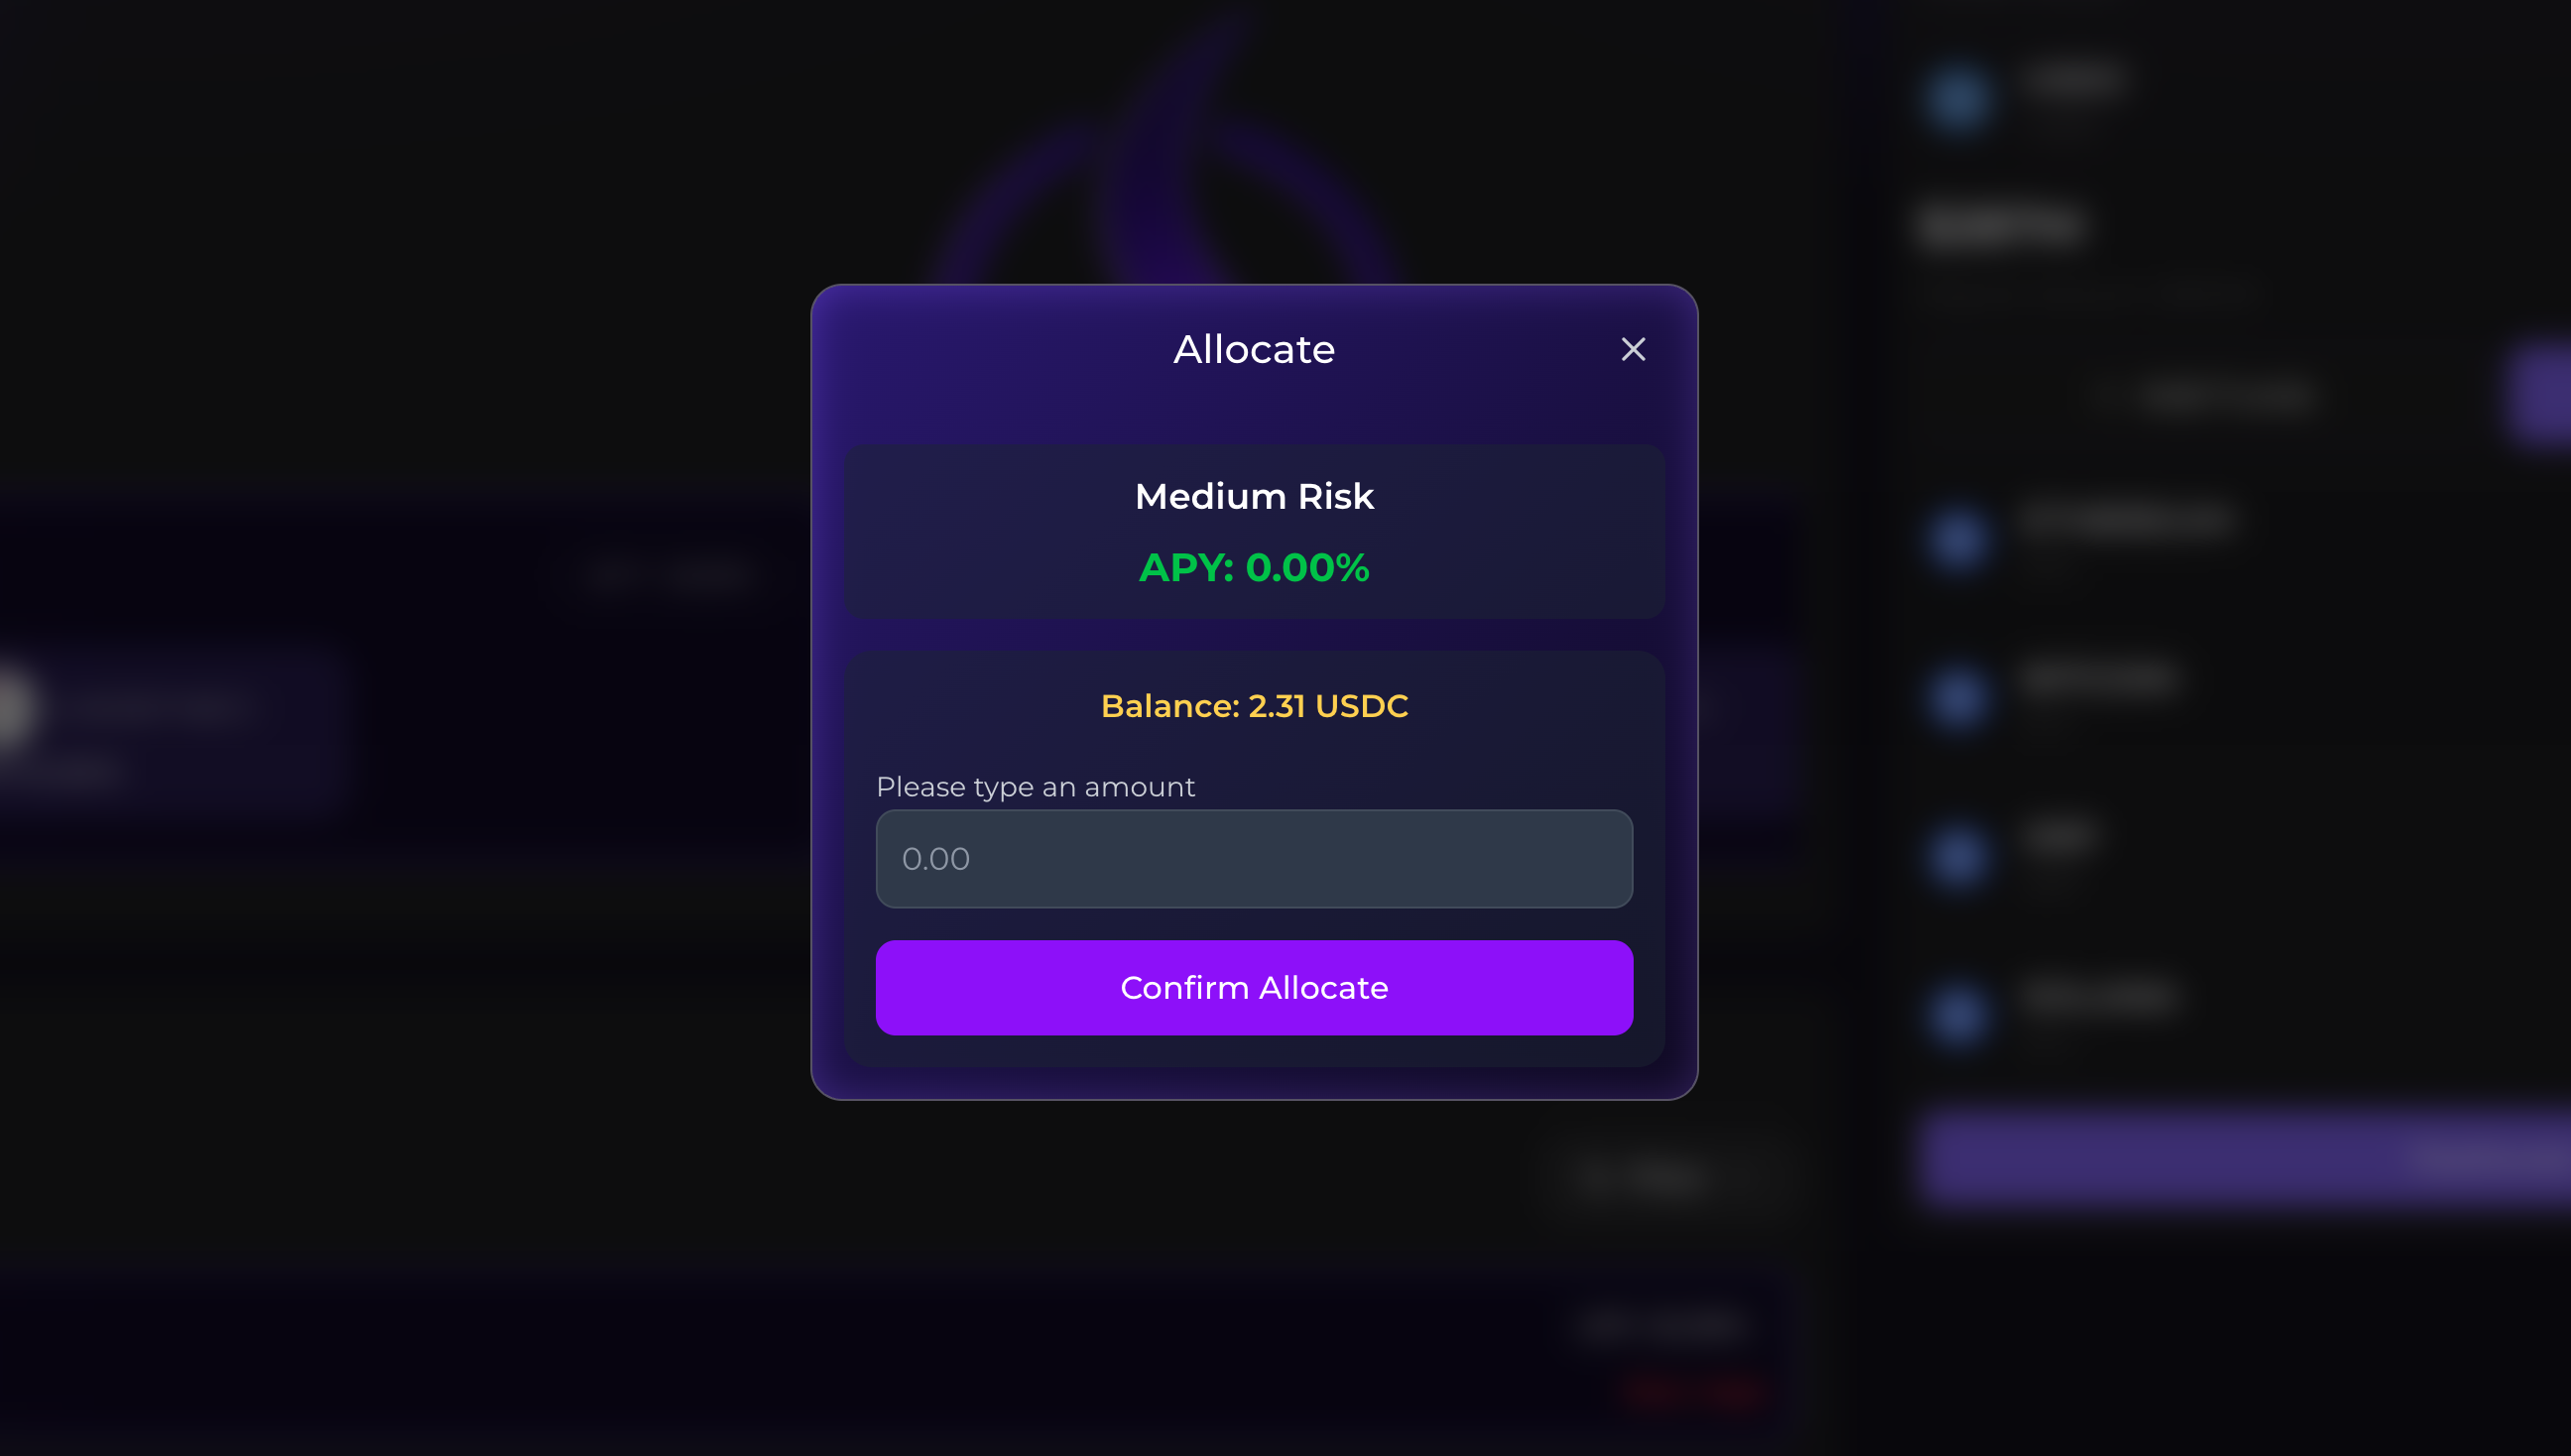
Enter allocation amount:
- Must meet the strategy minimum (varies by protocol)
- Funds come from the Account on the strategy's source chain
Once confirmed, click "Allocate" to complete the transaction. The UserOp is batched and gasless via your session signer.
Phase 3: Cross-Chain Operations (The Important Part)
Understanding Cross-Chain Allocations
Most allocations are same-chain: the strategy lives on the same chain as your Bundie Account, so funds flow directly with no bridge. But if a strategy lives on a chain where you don't have an Account, or if you're moving capital between Accounts, a LayerZero bridge handles the hop.
Step-by-Step Process (Cross-Chain Path)
1. You initiate (0 seconds)
- Click "Allocate" on the frontend
- The batched UserOp is signed gaslessly by your session signer
- Transaction submitted to the source Account chain
2. Smart contract sends (10-30 seconds)
- Your USDC leaves your Account on the source chain
- LayerZero bridge message created
- Transaction confirmed on the source chain
3. Pending state (2-5 minutes)
- Your allocation shows as "Processing"
- LayerZero relays the message across chains
- You can track progress via the LayerZero Scan link
4. Bridge completes (varies by chain)
- Your USDC arrives on the destination chain
- Destination Account / strategy receives your deposit
- You receive receipt tokens (e.g., ERC-4626 vault shares)
5. Validator confirms (under a minute)
- Our validator detects bridge completion
- Updates your Account's position on-chain
6. Position created (instant)
- Your position shows as "Active"
- You now hold receipt tokens tracked in your Account
- Yield begins accruing immediately
What You See During Processing
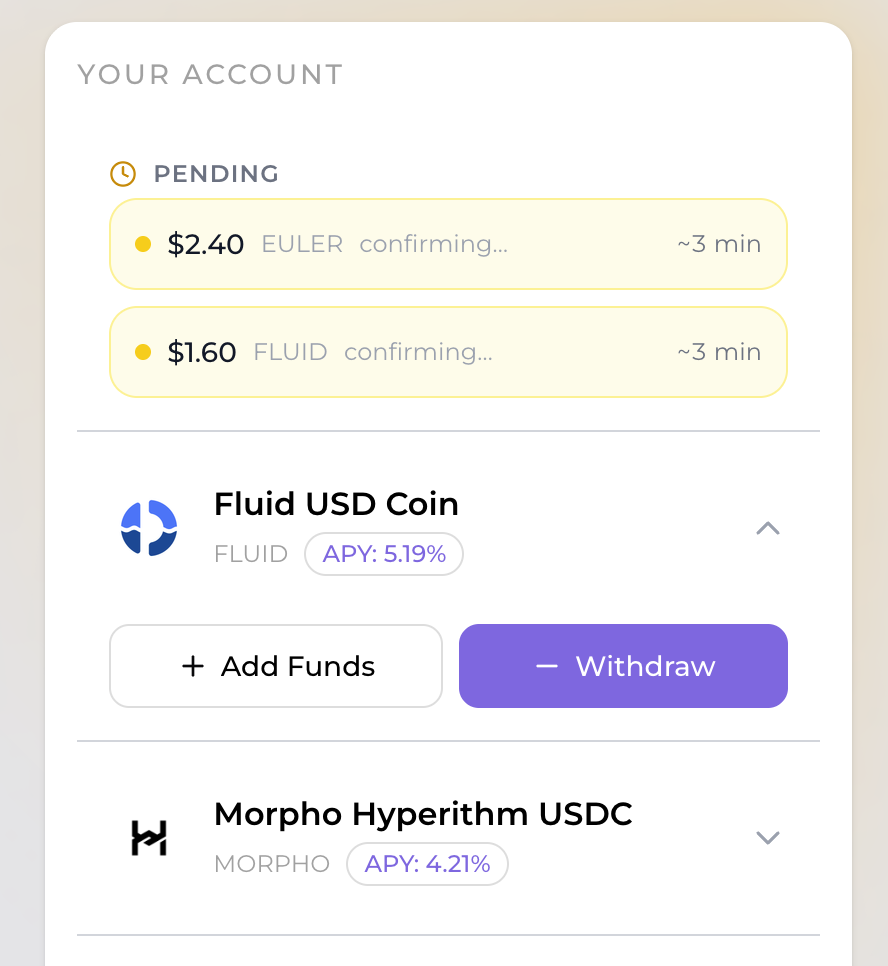
Pending operation card shows:
- Destination strategy and chain
- Amount deposited
- Estimated completion time (2-5 minutes)
- Current status (Processing → Confirming → Completed)
- LayerZero Scan link for real-time tracking
- Message GUID (for support if needed)
Shortly after: The validator confirms your deposit and your position becomes active.
Why the Wait?
Cross-chain operations need confirmation from the destination chain.
Without validator confirmation:
- Your Account wouldn't know if the bridge succeeded
- You might see a position that doesn't actually exist
- Failed bridges wouldn't trigger refunds
With validator confirmation:
- Your Account only shows real, confirmed positions
- Failed bridges automatically refund to your source Account
- You can trust your displayed balance
Same-Chain Allocations (Instant)
If your Account and the strategy live on the same chain:
- No bridging needed
- Instant confirmation
- Position active immediately
- Lower gas fees (gas only, no Relay/LayerZero quote)
This is why Bundie defaults the destination Account chain to your source chain whenever possible — it's the cheapest, fastest path.
Phase 4: Withdrawing (From / To)
Withdrawing a strategy position uses a From / To dual picker so you can land funds on whichever chain you actually want.
- From — locked to the chain the position is held on (you can't change where it lives without unwinding it).
- To — defaults to From (the no-bridge path), but you can pick any of your Bundie Account chains, including legacy Scroll.
When To ≠ From, you'll see an amber callout:
Cross-chain withdrawal: funds will bridge from {From} to {To} via LayerZero (~1–3 min, includes a small bridge fee).
Withdrawals to your wallet's EOA happen on the destination chain — pick the chain that matches where you want your funds to land.
Home: Your Balance Across All Chains
Your home screen sums USDC across all of your Bundie Accounts. Under the headline total, a row of chips shows each chain with a non-zero balance (chain logo, name, amount).
- Legacy Scroll is filtered out of the headline sum but still visible as an amber chip, so you can find the path to withdraw from it.
- Single-chain users (one Account) see no pickers anywhere — the multi-chain UI degrades to a static label automatically.
Troubleshooting Your Journey
"My deposit is stuck in Processing"
Check:
- Click the LayerZero Scan link in the pending operation
- Verify message status (INFLIGHT, DELIVERED, FAILED)
- If DELIVERED, wait briefly for the validator to confirm
- If FAILED, refund triggers automatically to your source Account
Timeline:
- Normal: 2-5 minutes
- Congested network: 5-15 minutes
- If stuck >20 minutes: Contact support with the message GUID
"I can't withdraw from a position"
Possible causes:
- Position is still "Processing" (wait for Active status)
- Insufficient liquidity in destination protocol (rare)
- You already have a pending withdrawal
Fix:
- Wait for the position to become Active
- Try a partial withdrawal instead of full
- Check "Pending Operations" for an existing withdrawal
"I don't see a chain I expected in the picker"
You may not have an Account on that chain yet. Go to Settings → Manage chains and add it — the same per-chain creation flow runs, and the chain shows up everywhere immediately after.
"My Scroll position is marked Legacy"
That's expected. Scroll is supported for withdrawals only. Use the From/To withdraw picker to move funds from Scroll to one of your current Account chains (Arbitrum, Base, etc.).
Next Steps
Now that you understand the complete multi-chain Account journey:
- Read Key Concepts for deeper technical understanding
- Join our Telegram for community support and strategy discussions
Ready to start? Launch Bundie App →