 Bundie
Withdraw Flow
Step-by-step guide to withdrawing funds from your Bundie Accounts
Withdrawing Your Funds
There are two kinds of withdrawal, depending on where your funds currently sit:
- Withdraw from a strategy — pull capital out of a yield position back into your Bundie Account
- Withdraw from your Account to your wallet — move idle Account funds out to your connected wallet
Both are multi-chain: funds stay on, or bridge between, your supported chains (Arbitrum hub, Base, Avalanche, Optimism, Celo, and Scroll as legacy). Cross-chain hops use LayerZero.
Withdraw From a Strategy
When you want to exit a yield position:
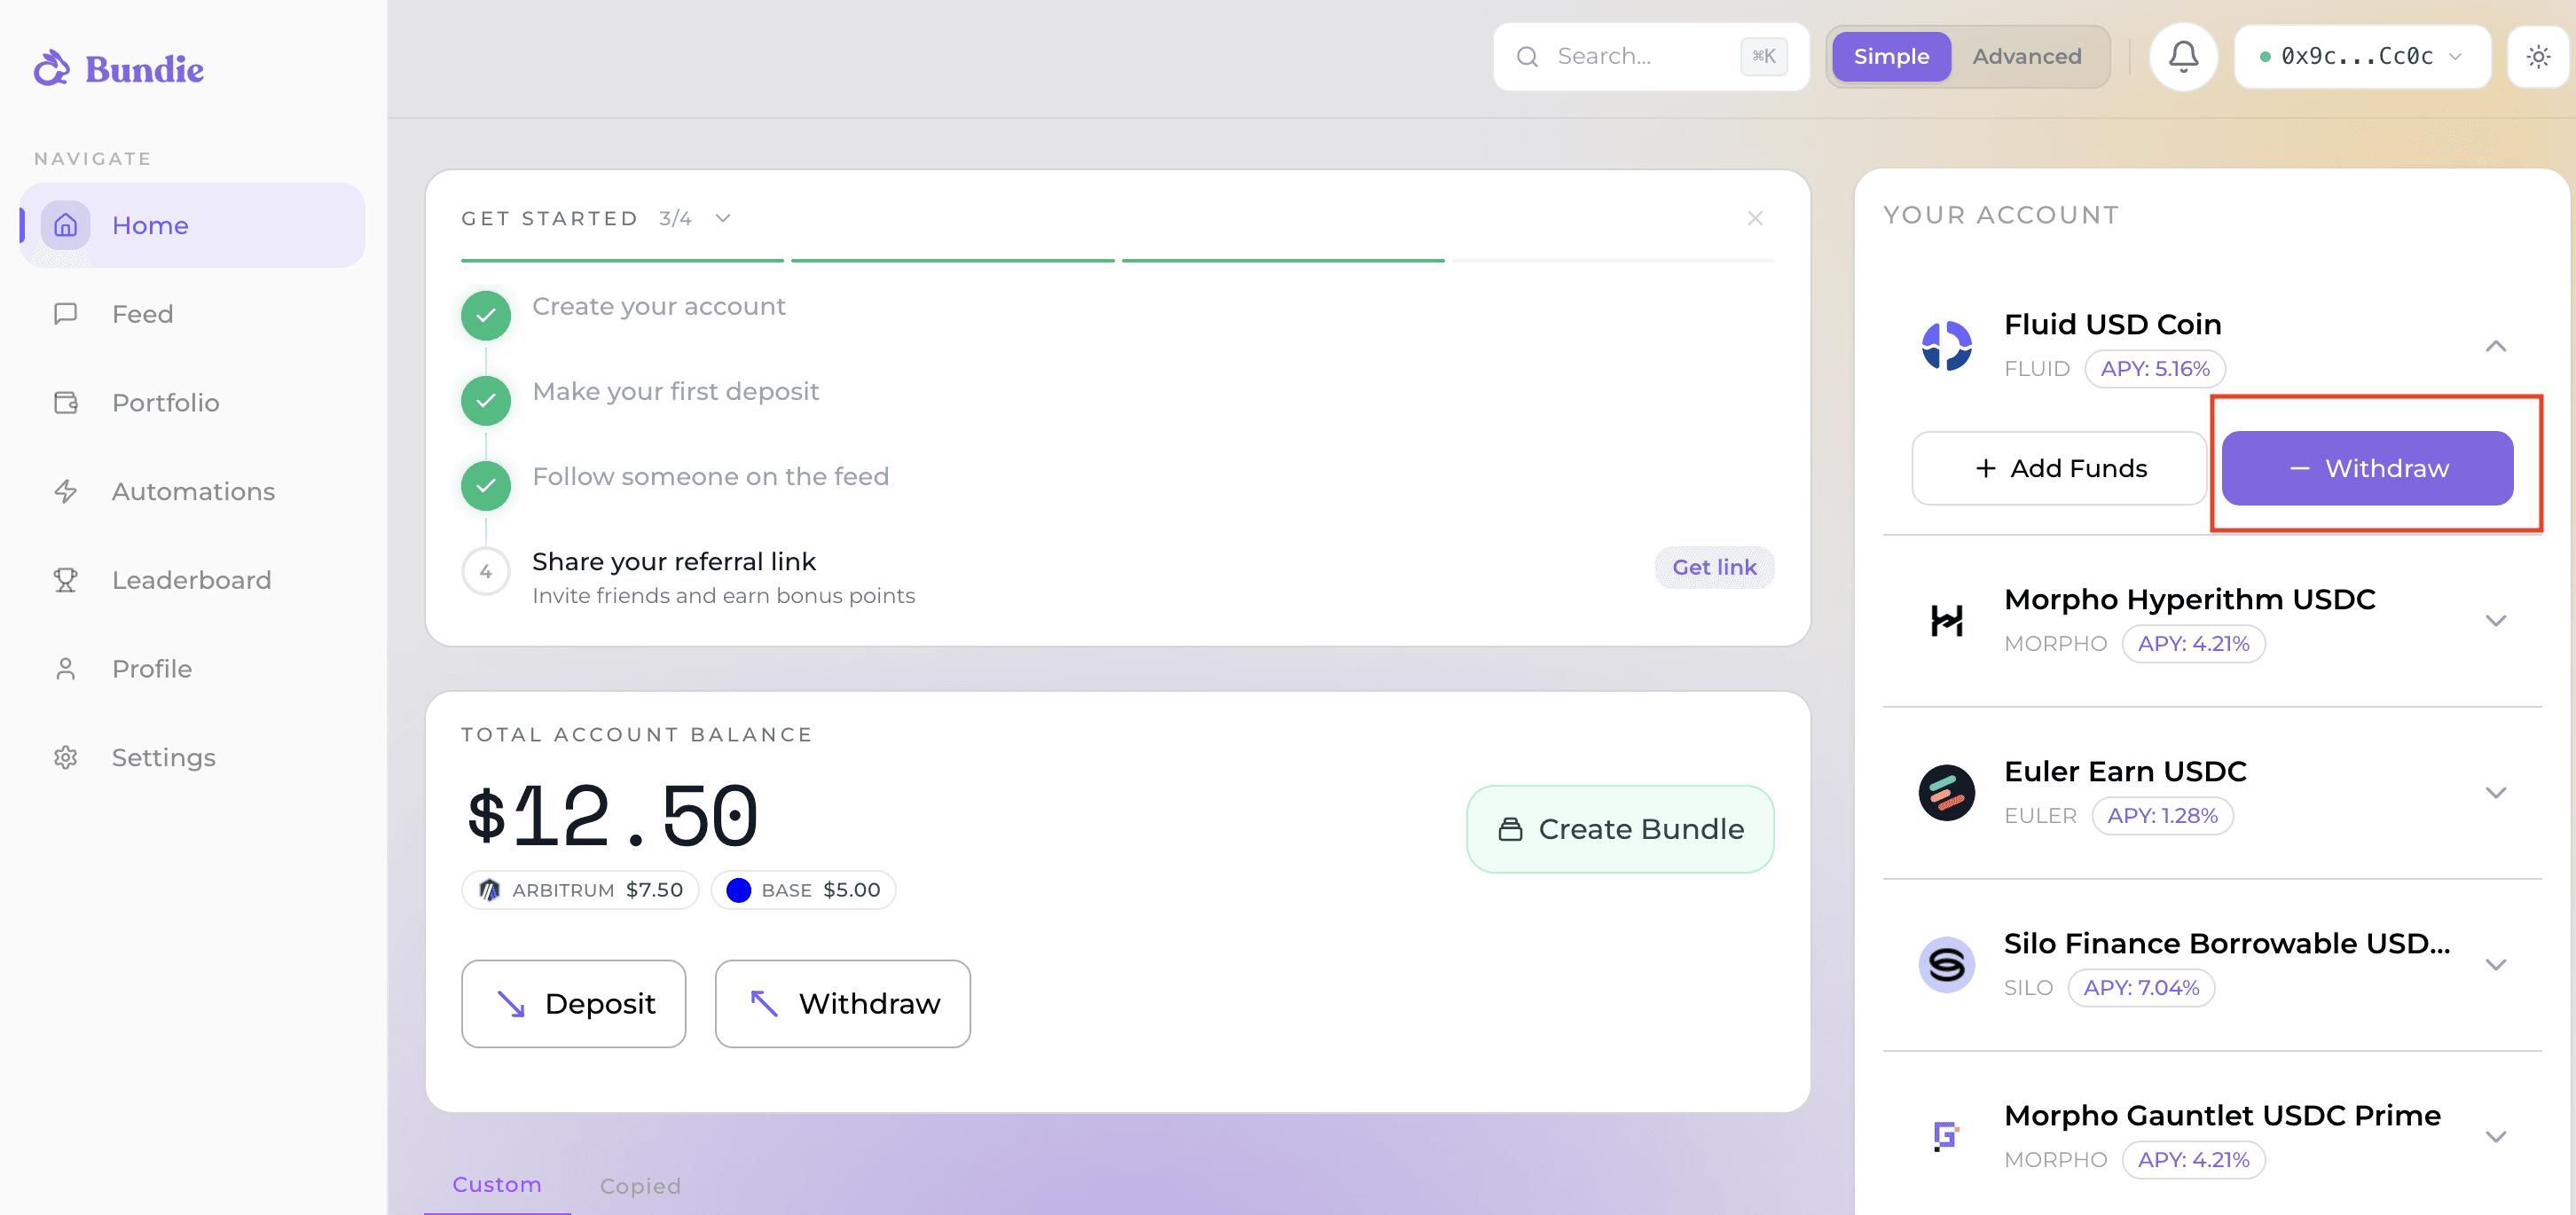
Navigate to: Your positions → select a position → Withdraw. This opens the "Withdraw Funds" modal.
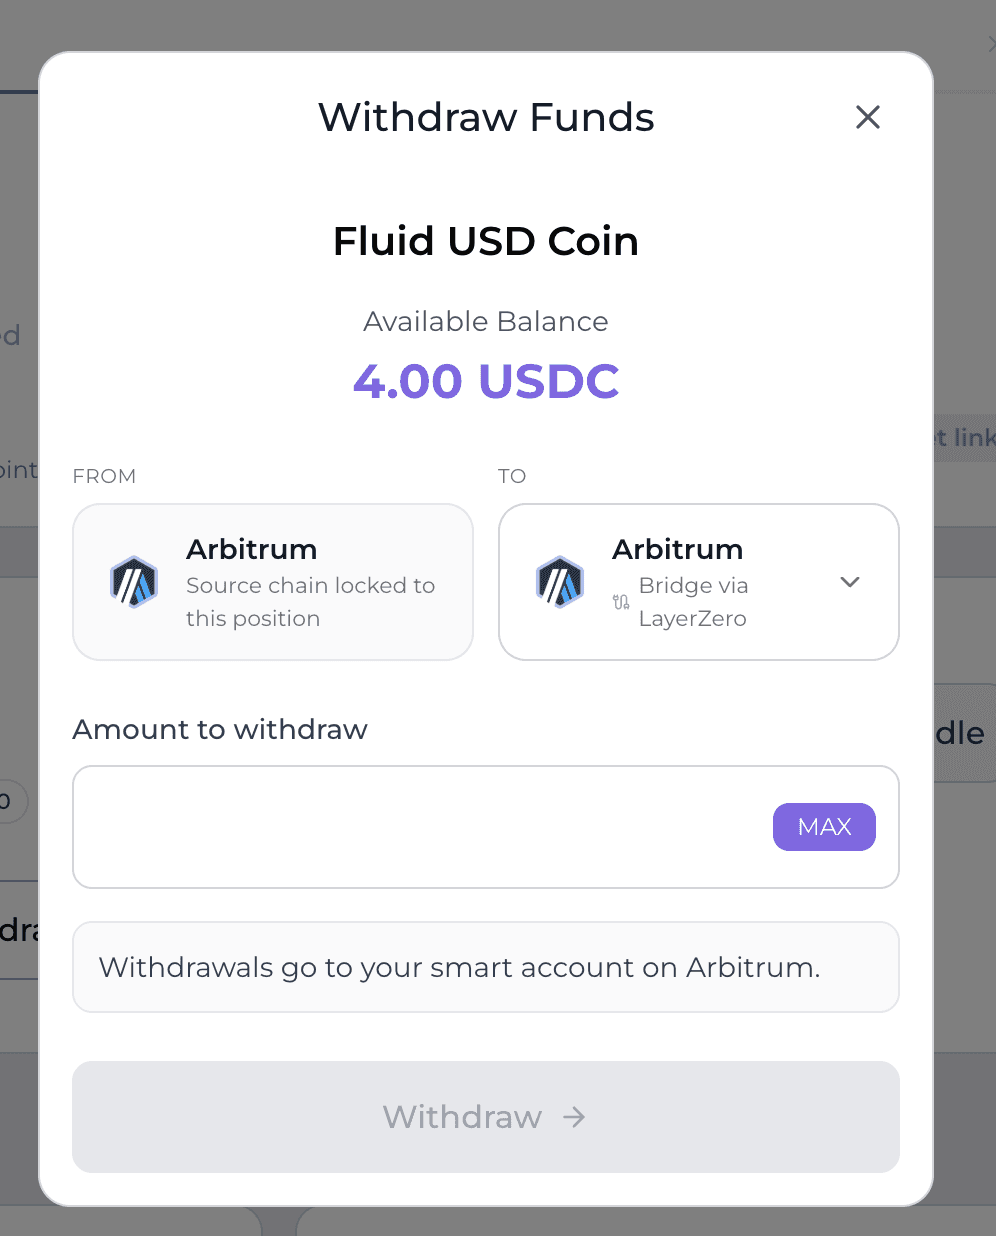
Enter amount:
- Partial withdrawal: type the amount
- Full withdrawal: tap MAX (for ETH positions, a small amount is reserved for gas)
Where it lands:
- By default, funds are released back into your Bundie Account on the same chain as the position — no bridge, gas only.
- If you have Accounts on more than one chain, From / To chain pickers appear so you can send the funds to a different chain. That path bridges via LayerZero:
Cross-chain withdrawal: funds will bridge from {From} to {To} via LayerZero (~1–3 min, includes a small bridge fee).
The action button reflects the path: Withdraw for a single chain, or Withdraw across N chains when withdrawing positions that live on multiple chains.
Progress: after you confirm in your wallet, the modal shows a two-step timeline:
- Source transaction confirmed — your Account released the position shares
- Bridging back to your account — usually arrives within a few minutes (same-chain withdrawals skip this step)
You can track in-flight withdrawals under Pending withdrawals, which polls every ~15 seconds until the transfer completes.
Withdrawing Several Positions at Once
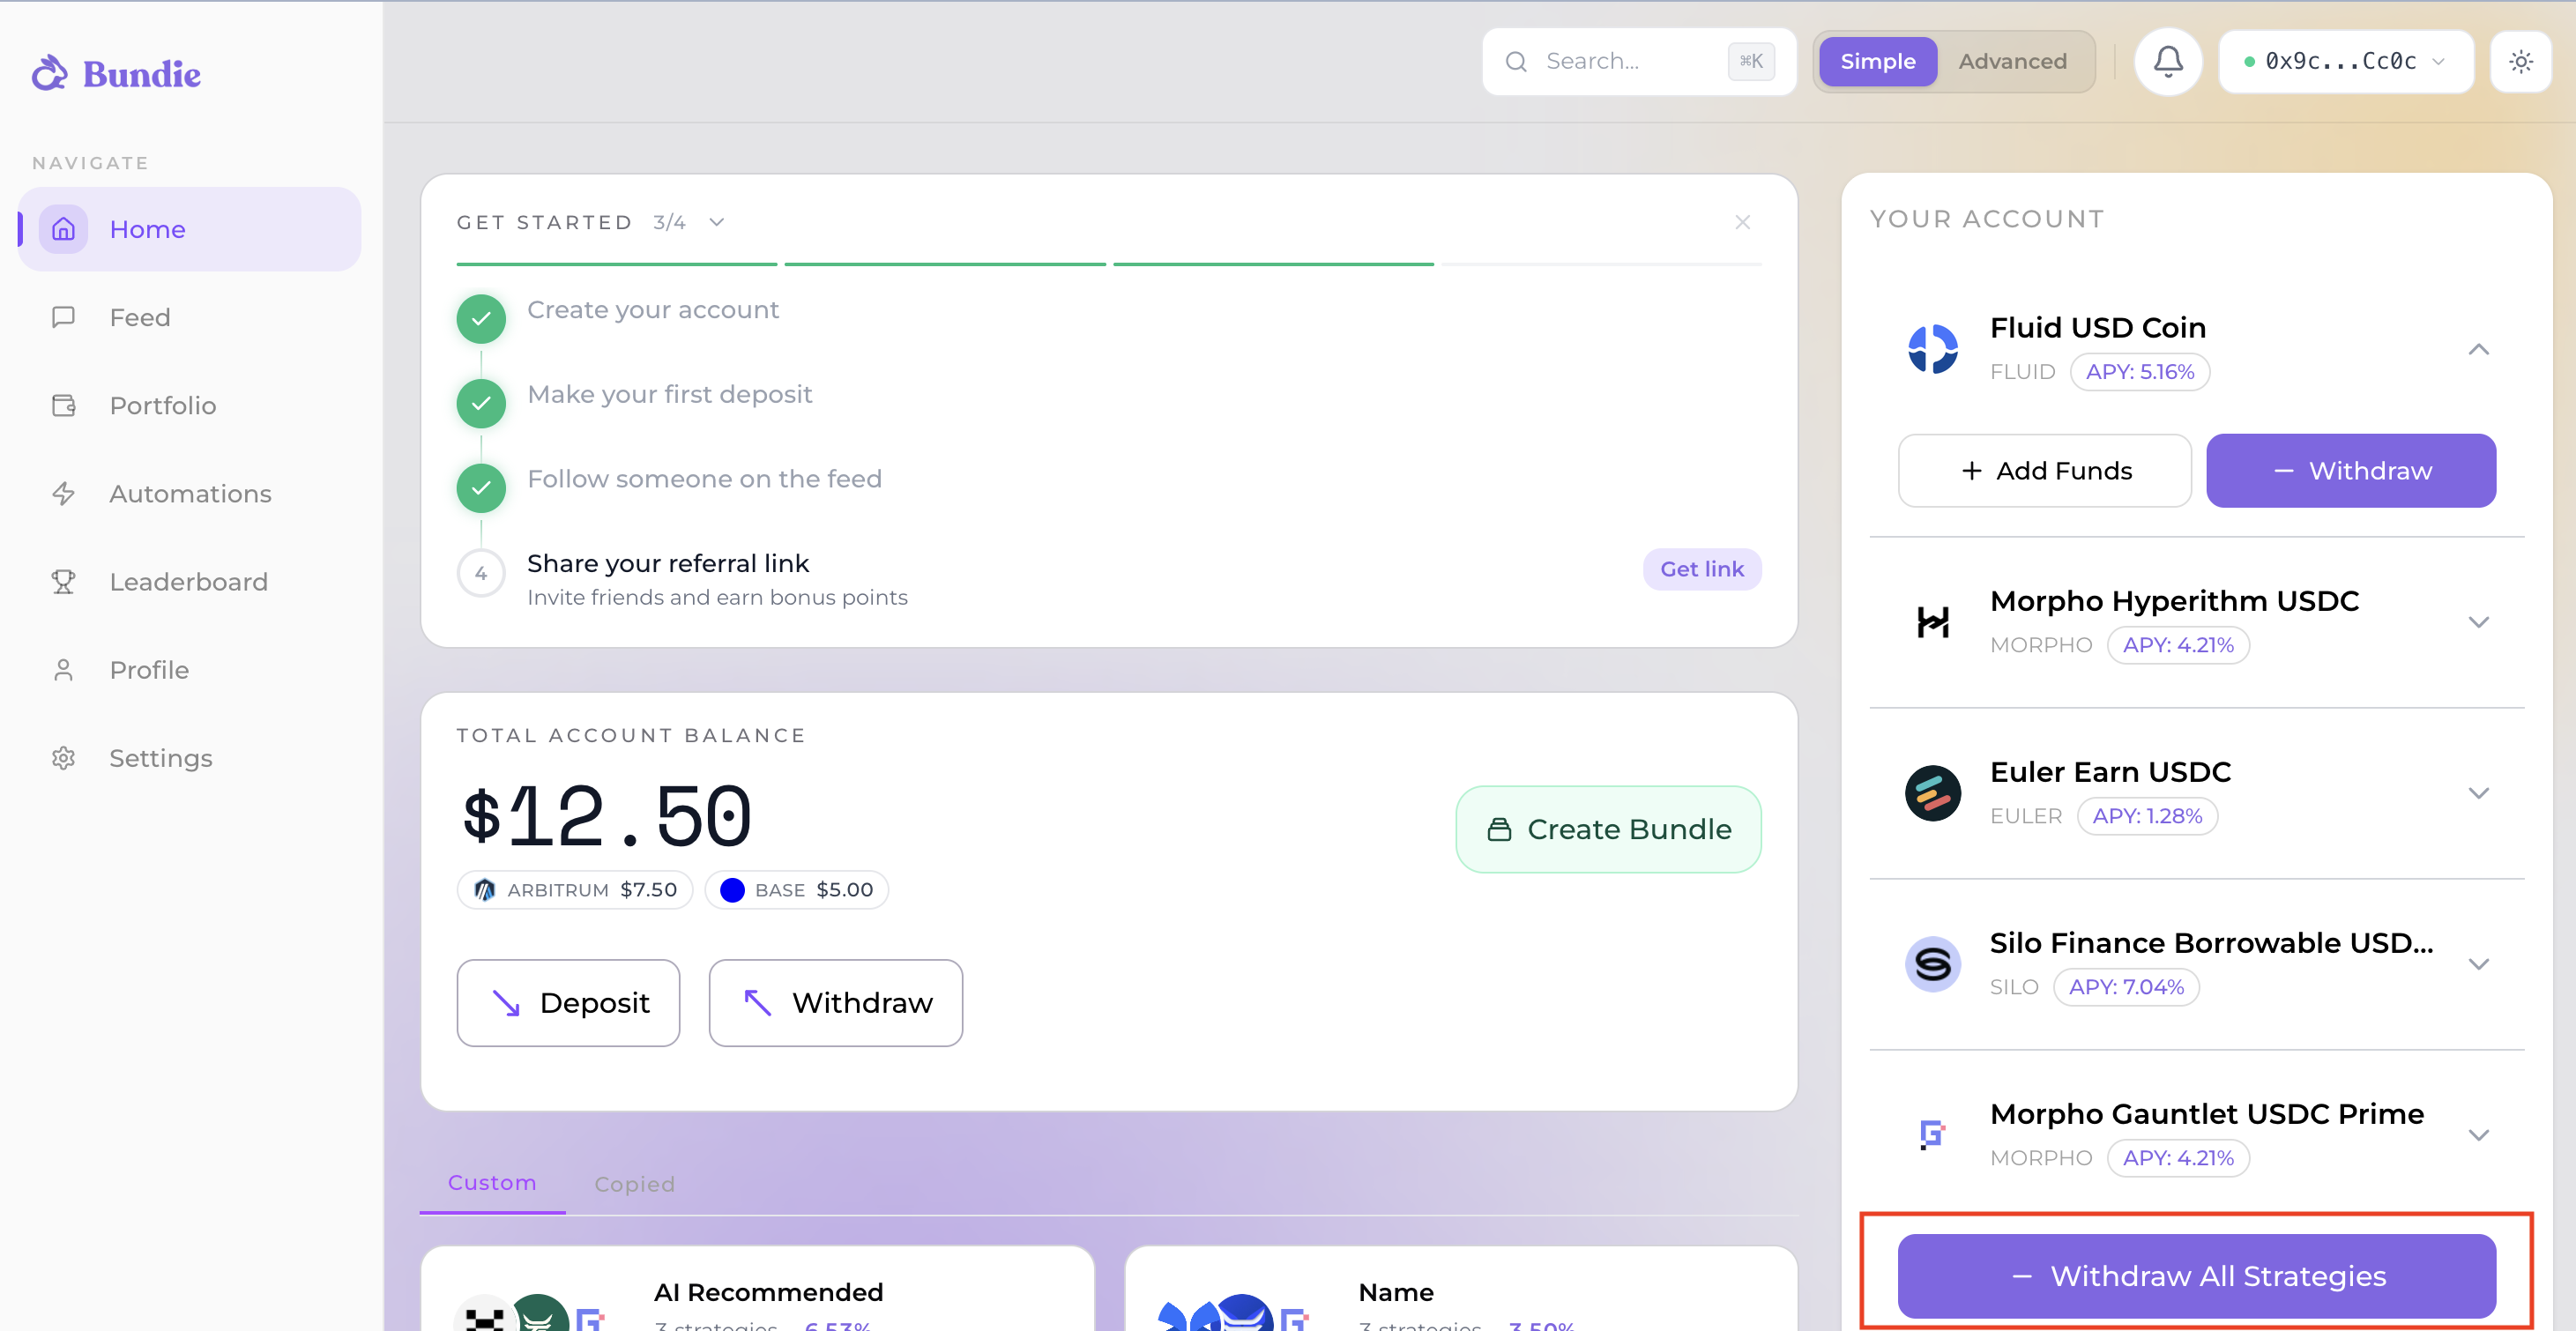
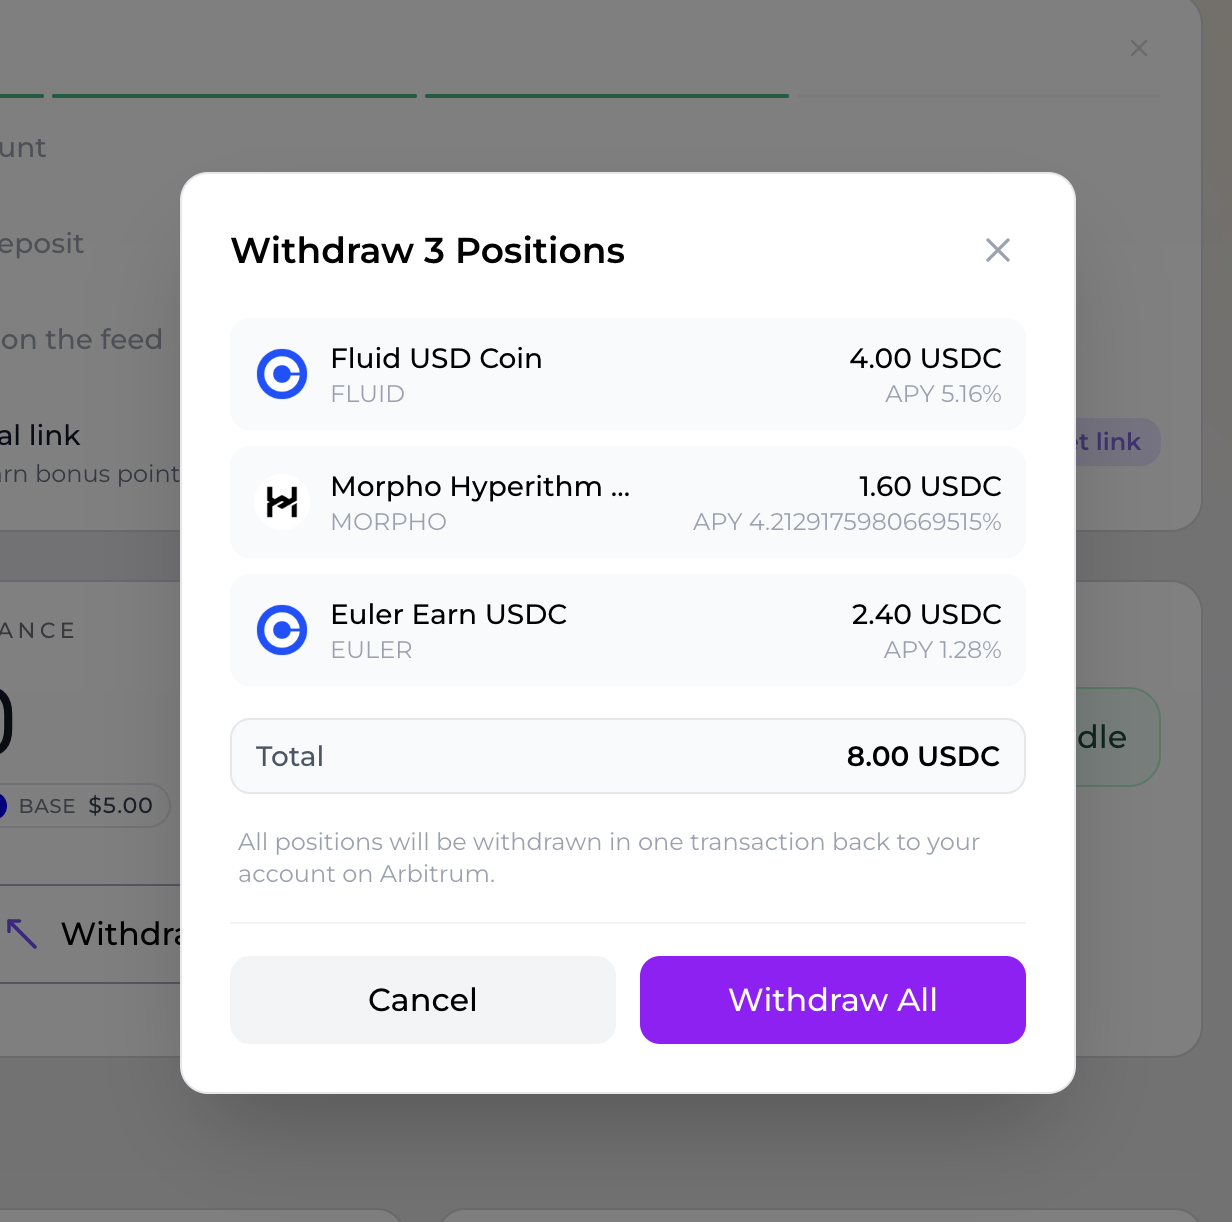
Selecting multiple positions opens the batch modal ("Withdraw N Position(s)") with a single Withdraw All button. Positions are grouped by chain and processed one transaction per chain, so you'll confirm each chain in turn and a single failed chain can be retried without redoing the others.
Withdraw From Your Account to Your Wallet
Once funds are idle in your Account (not deployed in a strategy), you can send them to your wallet.
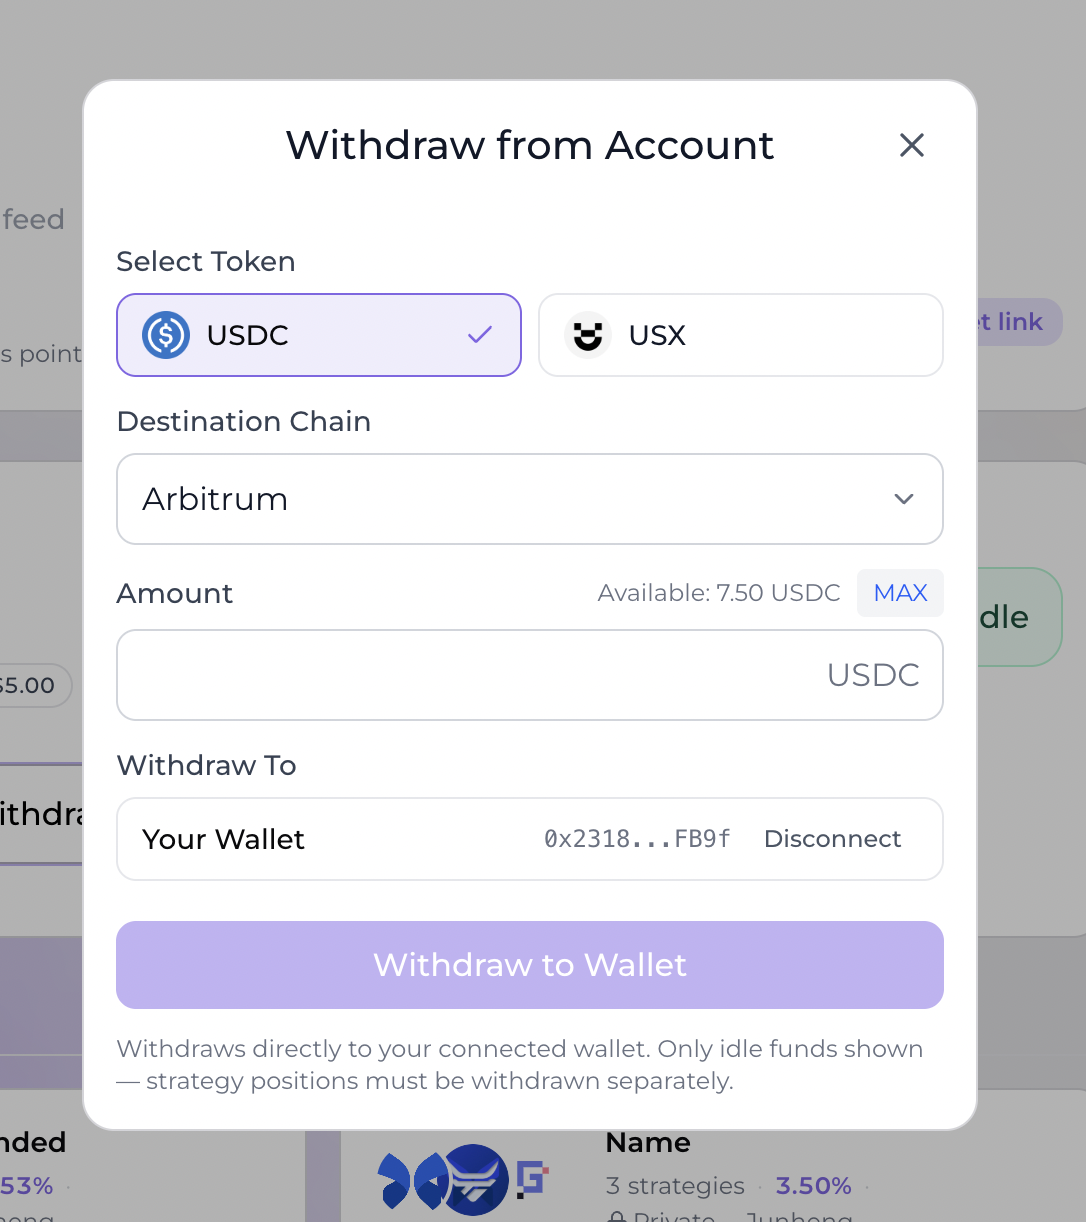
Open the "Withdraw from Account" modal, then:
- Pick a token — USDC (USX is shown only as a legacy Scroll asset)
- Pick a source chain — only shown if you hold idle funds on more than one chain
- Enter an amount — or tap MAX
- Pick a destination chain — defaults to the hub (Arbitrum) for a same-chain withdrawal; choose another chain to bridge
Where funds go: they are sent to your currently connected wallet — you don't enter an address manually. The button reads Withdraw to Wallet for a same-chain (hub) withdrawal, or Withdraw to Chain when bridging cross-chain.
- Same-chain (hub): withdraws directly to your connected wallet. Only idle funds are shown — strategy positions must be withdrawn separately.
- Cross-chain: funds are withdrawn to your smart wallet on the hub chain, then bridged via LayerZero to your selected chain.
Things to know:
- Cross-chain Account withdrawals currently support USDC only.
- A small LayerZero bridge fee applies to cross-chain withdrawals. If your balance is very low, the fee can exceed the amount and the withdrawal will fail — the modal warns you when that's likely.
Why It Works This Way
Strategies, Accounts, and your wallet are separate layers:
- Strategy → Account handles the protocol exit (and any cross-chain bridge back to your Account).
- Account → Wallet is a clean transfer to your own address, on whichever chain you choose.
Keeping them distinct lets each step stay simple, retryable per chain, and gasless where your session signer covers it.